I am frequently asked the specifics of how I plant warm-season crops so they will grow quickly and produce well. I occasionally mention the fact that I use red plastic and floating row covers in my columns so I thought you might appreciate seeing the step-by-step process.
Yesterday, I was finally ready to plant our winter squash and pumpkins. Here's how I did it:
1. I didn't think to show this in a photo but I start out with a soaker hose on each of my raised beds.
2. I cover the soil in each bed with a sheet of red plastic "mulch" which helps reflect back extra light onto the plants. The plastic is anchored down with metal "U-shaped" pins which my husband made out of a heavy gauge wire.
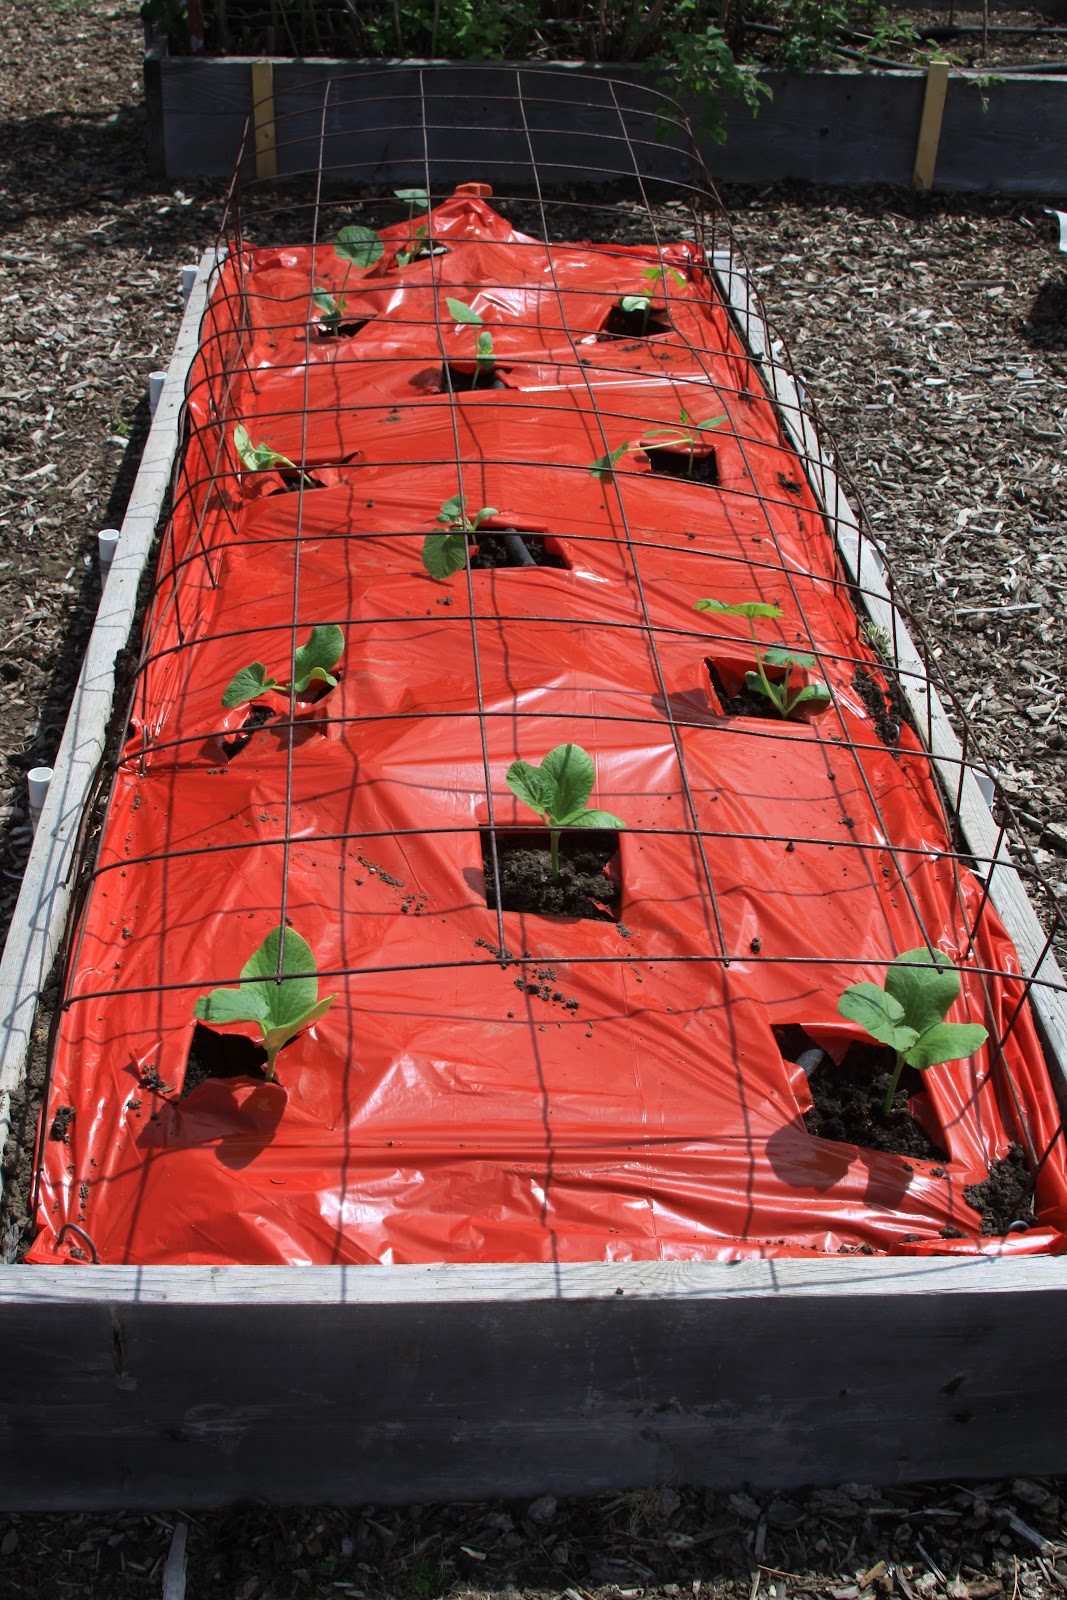
3. (Photo #1) Next, I cut little "x's" into the red plastic to plant my seedlings through. In the case of winter squash and pumpkins, I know they'll grow as vines rather than in bush form like summer squash does. So I can squeeze around a dozen seedlings into a single 3-foot by 8-foot bed.
4. (Photo #2) Once the seedlings are planted, I either cover the bed with hoops made from black plastic sprinkler pipe or an elevated wire grid. The wire grid is made from a 4-foot by 8-foot sheet of concrete-reinforcing wire. Since our raised beds are 3-feet wide, my husband bends over each lengthwise side of the wire so the grid sits about 8" above the plants.
5. (Photo #3) Then I cover the hoops or wire grid with a large sheet of floating row cover and weight it down to keep it from blowing off in the wind. This row cover with protect the plants from winds and also keep them a few degrees warmer which is just what warm-season crops like.
I hope this all makes sense! Remember that you can click on each photo for a larger view. Let me know if you have any questions by either commenting on this post or by e-mailing me at inthegarden@live.com.